Thursday, December 18, 2008

Design and Production Class Projects

Our second project for Design and Production was to design a line of objects that hold together aesthetically, are unique and original, and utilize current manufacturing technology. The project had to be outsourced. There needed to be at least 6 items in the line and we were asked to produce prototypes of all six designs and produce three designs in quantities of six.


April:
(do you have a blog??)
Had pins with photos of people practicing yoga and meditation and had an ad for a newspaper made with a brown paper bag reminding people to relax and breathe. The ad read "breathe" over and over again, and the paper bag had instructions on how to breathe into it.


Megan:
Sent forms she designed inspired by eggs to Ponoko. They laser cut the forms out of felt that she ended up making into brooches.


Karen:
Built fire hydrant salt and pepper shaker forms in Rhino and had them rapid prototyped and designed coasters that were laser cut out of acrylic.


Lizzy:
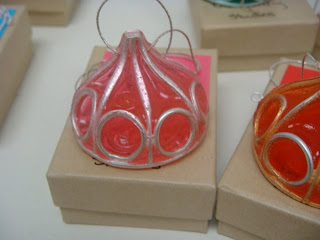
Had sterling filigree pieces cast that she filled with dyed rubber and made into a line of pendants and earrings.



Jo:
Had silicone rubber laser cut and she arranged the pieces to make brooches, earrings and bracelets.


Amy:
Built forms in Rhino that she had rapid prototyped, then made molds of these forms that she used to cast concrete. The end result was a line of concrete pendants, all slightly different from one another.


Ring #4 - Stock

For my stock ring, I started off with a piece of sterling silver square wire that I think is 14 gauge. First I rolled the stock and then hammered it to create a simple band ring. Then I used the leftover stock I sawed off from the piece I made the band ring out of and rolled it to get it much thinner. After rolling it, I hammered it to distort the metal and get the edges to curl a little bit. I cut shapes out of the sheet I created and soldered one piece on top of the other, in an attempt to create a circular layered form, similar to the image of the fungus below. After making this part, I soldered it onto the band ring.

As of now, there's solder all over the fungus part of the ring and it looks messy. Once I figure out how to clean this off (the silver is so thin it's close to 26 gauge now), I want to curl the edges up of each little piece of flattened silver that forms the fungus part of the ring.

Thanks to Dillon, I learned how to create a band ring from stock, which I've never worked with before. She taught me how to hammer the metal correctly, which hammers to use, walked me through the band ring making process, and helped me brainstorm to come up with my final form.

Inspiration:


Wednesday, December 17, 2008

Ring #3 - Tube

For my ring made out of tubing, I started with 6 mm sterling silver tubing. Amy let me borrow her tubing cutter - which I might add is the coolest tool EVER - and I sawed the tubing into pieces that are about 1.5 mm thick. I originally wanted this ring to be a double finger ring, wrapping around the fingers like the image of the mold below. However, the whole process of cutting the tubing and soldering them together took way longer than I had anticipated. So as of right now, it is only a one finger ring. I hope to add more to it tomorrow and stick it in the tumbler with steel shot to get it nice and shiny.

Inspiration:


Excited!

I'm wide awake, at 2:30 in the morning the night before my design and production crit. I'm so nervous that I can't sleep.

I am also so excited because an artist that Jan told me to google, Cynthia Eid, commented on one of my posts where I cited her! How cool is that?!?!?!

I'm also very excited because I finally (a month later) got my die form together! It still needs a little bit more finishing, and then it will be ready to turn in! Although this project was extremely challenging for me, I'm glad I stuck with my original idea of using more than 2 pressed pieces to create the form.

I chose to originally press 3 pieces and solder them together to form a seed pod. This came out looking absolutely horrid, so Richard suggested that I try using 4 pieces instead of 3. I ended up soldering the first 2 pressings together at a right angle, and then the second 2. Then I joined these 2 larger pieces. This was much much easier than trying to arrange 3 pieces to fit together. Thanks Richard!

The end result does not read "die form" in my mind, and because of this I think this project was a success and I am proud of it.
I would like to take it further and learn the correct way to clean up the seams and then make this form something other than an object that sits on a table. I don't know what I want it to be yet, but I definitely want to continue with it.

Here is my inspiration for the piece:


Here are some pics of the piece, unfinished:


I am so glad I chose not to make a die form out of 2 pieces. These are my die form samples are I think they are fairly boring and scream "i die formed!"

Bedazzled at the Walters


To learn about the history of jewelry and to receive extra credit Jan had us go see the Bedazzled exhibition at the Walters. I think it was the perfect way to start our ring project. I got most of my design research on rings from this exhibition.

The exhibition was beautiful. Smaller than I expected it to be, but beautiful nonetheless, and very informative. Here are some pics I took starting from the beginning of the exhibition and working my way down to the end:


Etruscan:


Egyptian:


Roman:


Renaissance:


Draw plate:

I had to include this because I learned how to use the draw plate in our studio at school for the first time so I was excited to see this!


Lalique:


French:


Some random rings that I liked:

these came from all over, not sure exactly which era each ring is from...